We have moved on from film bath to develop negatives from original camera negatives to digital age where film are being digitized with 'digital intermediate' by scanning film.
The softwares like Filmlight, Davinci Resolve, Nukoda, Smoke, Luster are used to color correct and grade a film in digital color space on high end computers or even fast laptops "digitally" by a colorist or an editor on NLE's apps. Due to new improvements, frame rates and workflows may confuse a filmmaker.
How a 'film' is edited:
When we use film the standard playback is 24 frames per second (24) which runs on the camera which exposes light on a negative and a chemical process takes place. Its just series of moving images which is called a frame. A frame is single exposure of image on a negative stored through photo chemical process which is developed as a positive in a lab from the original camera negative (OCN).
If you shoot on 60 fps or 48 fps doesn't matter since a film does not have a timecode. When you edit it optically the 48 fps and 60 fps will run slower when played on 24fps projector for example 'Raging Bull' slow-mo sequence.
But nowadays we convert film into tapes which has timecodes with edgecodes information as reference which tells the editor the physical address of the frames on the negative on 16MM/35MM/65MM negative. This process is called telecine (telekine) in which a editor gets the tape containing the rushes in form of Digibeta, DV tape or HD SR tape with digital logs containing data which the editor edits and later on makes a cut list for the negative cutter/confirmst to cut the film optically from the original negative or the editor provides xmls or edl's to labs to scan the negative for color correction process (DI) and VFX to produce a married print which contains picture and sound which is stored on negatives, tapes, optical discs or DCP (Digital cinema package) on hard drives for distribution.
How a digital film is edited:
Even though digital film is fast catching up. It also poses some problem like on some DSLR cameras there is no continuous time codes it only records clip names, date and time of the video clip and the its shot on different cameras on different frame rates.
Digital Cinema:
There two types of digital recording medium
Tape and tape less
a. Tape:
If you shoot your content on DV, HDV, HD-SR tape.
b. Tape less
If you shoot your content on digital then its stored on Hard drives, RED Mag, Codex, Gemini, SxS, SD Memory cards, Optical disk etc.
All the tape less media is called OCF - Original Camera Files.
12 FPS to 24 FPS
If you have lesser frame footage. Let’s say 12 fps with dialogue.
Take the footage from media pool or media browser bin and drop it in the timeline.
Give a 24 fps export.
It will be a new OCF clip which you can bring back for offline edit timeline with transcode/proxy. Make sure to match source resolution on Resolve.
23.976 to 24 FPS
If you have 23.976 footage you want 24 fps then change clip attribute/interpret footage to 24fps it will speed the clip a bit. Only if you don’t have a dialogue.
Please also note if you convert the footage then you will make an entire new clip lose the original metadata and clip won't link during conform stage during DI due to the difference. The new clips become the master clip.
Adobe Premiere Pro has 'Interpret Footage' option.
Right click on the clip - Modify - Interpret Footage
Same can be done on Da Vinci Resolve with changing clip attribute in the Media Pool.
and export as individual clips or one single clip.
Updated Final Cut Pro X - You can use re timing to change fps to match project same with Compressor.
100fps/60fps/50fps/48fps to 24 for making slo mo
Same can be done to make slo mo shot let's say when using DSLR. Take 100 fps clip and change attribute to 24 fps.
In Pro cameras you can shoot 100 fps or any other slo mo fps and set project to playback and record as 24 fps to play.
If you have mixed clips 23.976, 25 fps, 30fps
Set the sequence to the lowest fps settings and add other frame rates clips in the timeline and give a ref export for final project frame rate if it's going for DI along with EDL/AAF. Check the sync and frames.
Nowadays in DI software a conformist has an option to handle mixed frame rates and frame sampling, blending or optical flow which is used for slo mo shots. It's better to pre plan and not think of 'Fix it in post'.
Other way is one by one make a standardised clip lets say 24 fps in external software like Resolve or using a different sequence in premiere. By setting a sequence let's say 24 fps and exporting as 24 clips at source res then by dropping it back in the editing NLE timeline sequence as single clip.
It may look like this 23.976 fps clips as 24, 25 clips fps as 24, 30 fps clips as 24 also using it as master original clip for DI.
Generally faced this issue during interviews at a events where the videographer has to constantly change frames for slomo on a DSLR and interview gets recorded at let's say 60 fps. You have to standardise it. I make a 24 fps sequence and export is as 24 and bring to timeline.
Update for proxies:
You can use Da Vinci resolve lite /Studio, Filmlight Daylight, silverstack lab or Adobe Media Encoder even Premiere Pro/Avid/FCP etc. to make low res proxy for offline edit.
The softwares like Filmlight, Davinci Resolve, Nukoda, Smoke, Luster are used to color correct and grade a film in digital color space on high end computers or even fast laptops "digitally" by a colorist or an editor on NLE's apps. Due to new improvements, frame rates and workflows may confuse a filmmaker.
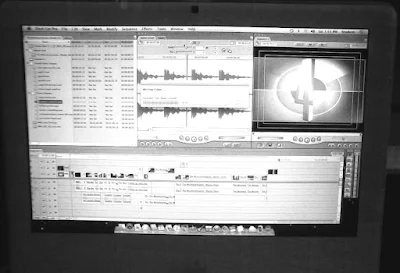 |
| MY FCP 7 TIMELINE DOING MY STUDENT PROJECT |
Lets understand how a movie is edited for a film or digital film (video).
How a 'film' is edited:
When we use film the standard playback is 24 frames per second (24) which runs on the camera which exposes light on a negative and a chemical process takes place. Its just series of moving images which is called a frame. A frame is single exposure of image on a negative stored through photo chemical process which is developed as a positive in a lab from the original camera negative (OCN).
If you shoot on 60 fps or 48 fps doesn't matter since a film does not have a timecode. When you edit it optically the 48 fps and 60 fps will run slower when played on 24fps projector for example 'Raging Bull' slow-mo sequence.
But nowadays we convert film into tapes which has timecodes with edgecodes information as reference which tells the editor the physical address of the frames on the negative on 16MM/35MM/65MM negative. This process is called telecine (telekine) in which a editor gets the tape containing the rushes in form of Digibeta, DV tape or HD SR tape with digital logs containing data which the editor edits and later on makes a cut list for the negative cutter/confirmst to cut the film optically from the original negative or the editor provides xmls or edl's to labs to scan the negative for color correction process (DI) and VFX to produce a married print which contains picture and sound which is stored on negatives, tapes, optical discs or DCP (Digital cinema package) on hard drives for distribution.
How a digital film is edited:
The digital film is a popular format for shooting movies, television programs or documentaries. The advantage of digital is that its cheap when you want to make changes in offline stage and also because some cameras are light enough to shoot in extreme conditions like Go Pro Hero under water and for guerrilla style filming with DSLR Canon 5D Mark III cameras. C100. They are also new breeds of digital movie camera like Red cameras which is near to film look or grade them like film Even traditional camera makers are developing Arri Alexa and Sony camera pioneering digital cinemas.
Also because you can directly edit the film without going to expensive lab procedures for developing the original negative through telecine process which ends the long waiting process. You can right away start editing your contents after the days shoot on Apple Final Cut Pro, Adobe Premiere or Avid Media Composer.
Also because you can directly edit the film without going to expensive lab procedures for developing the original negative through telecine process which ends the long waiting process. You can right away start editing your contents after the days shoot on Apple Final Cut Pro, Adobe Premiere or Avid Media Composer.
Even though digital film is fast catching up. It also poses some problem like on some DSLR cameras there is no continuous time codes it only records clip names, date and time of the video clip and the its shot on different cameras on different frame rates.
Digital Cinema:
There two types of digital recording medium
Tape and tape less
a. Tape:
If you shoot your content on DV, HDV, HD-SR tape.
b. Tape less
If you shoot your content on digital then its stored on Hard drives, RED Mag, Codex, Gemini, SxS, SD Memory cards, Optical disk etc.
All the tape less media is called OCF - Original Camera Files.
Mixing clip frame rates
Note: Backup your project first and rushes. This tricks and solutions may or may not work on different softwares but basics are same.
12 FPS to 24 FPS
If you have lesser frame footage. Let’s say 12 fps with dialogue.
Take the footage from media pool or media browser bin and drop it in the timeline.
Give a 24 fps export.
It will be a new OCF clip which you can bring back for offline edit timeline with transcode/proxy. Make sure to match source resolution on Resolve.
23.976 to 24 FPS
If you have 23.976 footage you want 24 fps then change clip attribute/interpret footage to 24fps it will speed the clip a bit. Only if you don’t have a dialogue.
Please also note if you convert the footage then you will make an entire new clip lose the original metadata and clip won't link during conform stage during DI due to the difference. The new clips become the master clip.
Adobe Premiere Pro has 'Interpret Footage' option.
Right click on the clip - Modify - Interpret Footage
Same can be done on Da Vinci Resolve with changing clip attribute in the Media Pool.
and export as individual clips or one single clip.
Updated Final Cut Pro X - You can use re timing to change fps to match project same with Compressor.
100fps/60fps/50fps/48fps to 24 for making slo mo
Same can be done to make slo mo shot let's say when using DSLR. Take 100 fps clip and change attribute to 24 fps.
In Pro cameras you can shoot 100 fps or any other slo mo fps and set project to playback and record as 24 fps to play.
If you have mixed clips 23.976, 25 fps, 30fps
Set the sequence to the lowest fps settings and add other frame rates clips in the timeline and give a ref export for final project frame rate if it's going for DI along with EDL/AAF. Check the sync and frames.
Nowadays in DI software a conformist has an option to handle mixed frame rates and frame sampling, blending or optical flow which is used for slo mo shots. It's better to pre plan and not think of 'Fix it in post'.
Other way is one by one make a standardised clip lets say 24 fps in external software like Resolve or using a different sequence in premiere. By setting a sequence let's say 24 fps and exporting as 24 clips at source res then by dropping it back in the editing NLE timeline sequence as single clip.
It may look like this 23.976 fps clips as 24, 25 clips fps as 24, 30 fps clips as 24 also using it as master original clip for DI.
Generally faced this issue during interviews at a events where the videographer has to constantly change frames for slomo on a DSLR and interview gets recorded at let's say 60 fps. You have to standardise it. I make a 24 fps sequence and export is as 24 and bring to timeline.
Update for proxies:
You can use Da Vinci resolve lite /Studio, Filmlight Daylight, silverstack lab or Adobe Media Encoder even Premiere Pro/Avid/FCP etc. to make low res proxy for offline edit.
If you are still using Final Cut Pro 7:
Cinema tools can also make 50 fps to 25 fps to playback clips as slomo or you can use compressor to re-time.
